


In today’s fast-paced business environment, keeping track of customer interactions is essential for delivering a seamless customer experience. Dynamics 365 CRM offers powerful tools to capture and manage customer emails, especially with Outlook integration. By tracking Outlook emails in Dynamics 365, organizations can ensure important communications are centralized, enabling better collaboration and faster response times. Learn more about CRM Implementation Services to maximize email tracking efficiency.
Key Benefits of Tracking Emails in Dynamics 365 CRM
- Centralized Communication: All customer interactions are stored in one place, improving transparency and consistency.
- Enhanced Productivity: Sales and service teams can access key email data without switching platforms. Learn how Microsoft Business Central enhances CRM and email integration.
- Streamlined Follow-ups: Automated tracking makes it easier to stay on top of customer inquiries and sales opportunities.
Set up
The Dynamics 365 App for Outlook allows you to access Dynamics 365 Sales data directly within Outlook, enabling you to track emails, create new records, view customer insights, and perform other CRM-related tasks without switching between applications.
To deploy the Dynamics 365 App for Outlook, in your organisation, follow these steps
Step 1: Set the default synchronization method
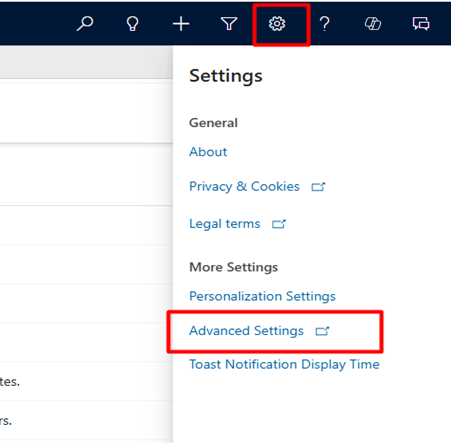
From your app, go to Settings > Advanced Settings.

2. Go Administration and then select Email.
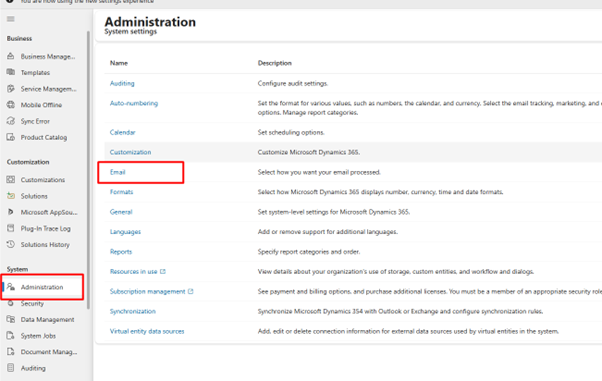
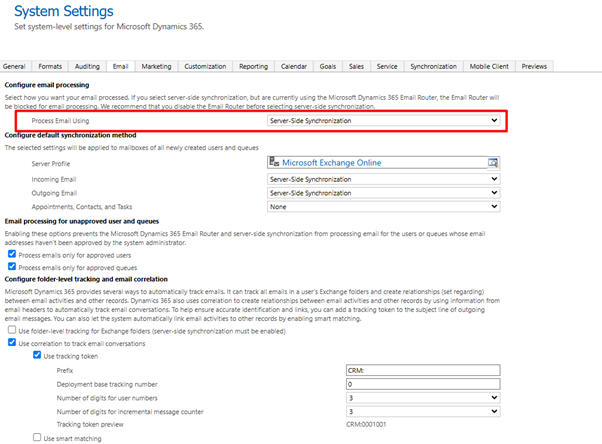
3. Set Process Email Using to Server-Side Synchronization
Step 2: Test email configuration and enable mailboxes
- From your app, go to Settings > Advanced Settings.
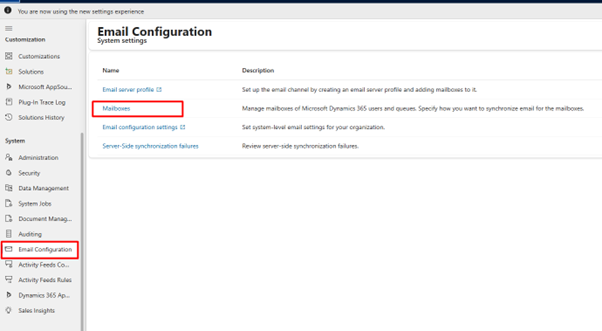
2. Go Email Configuration and then select Mailboxes.
3. Select the Active Mailboxes view, and then select the mailboxes that you want to test and enable
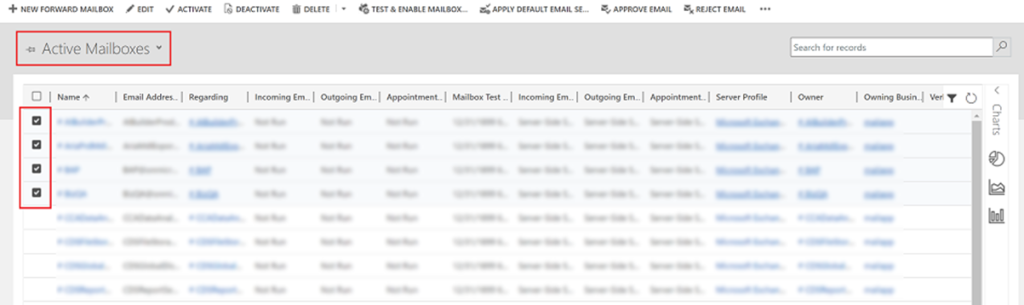
4. On the command bar, select APPROVE EMAIL and then select OK

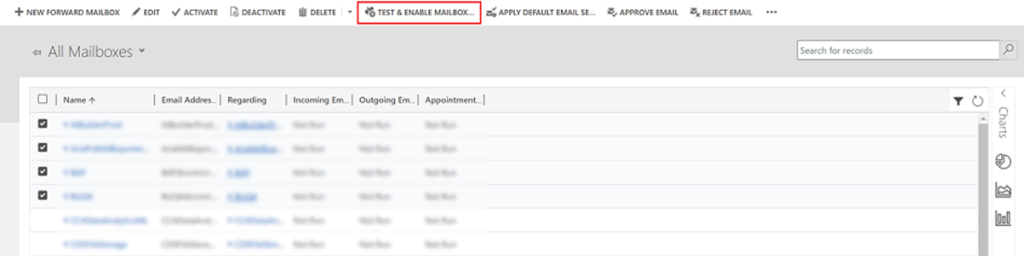
5. Once approved, select TEST & ENABLE MAILBOX.
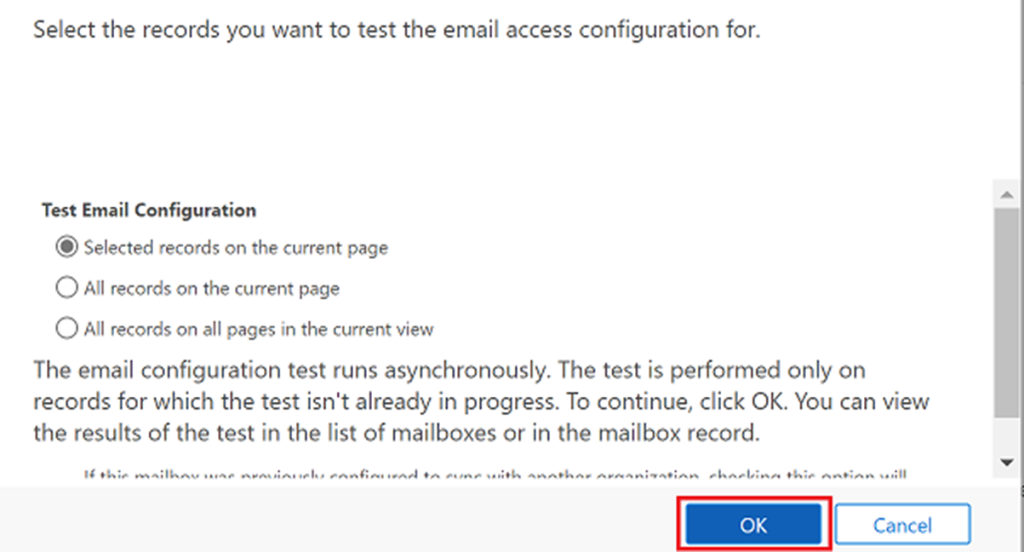
6. On the confirmation dialog box, select OK.
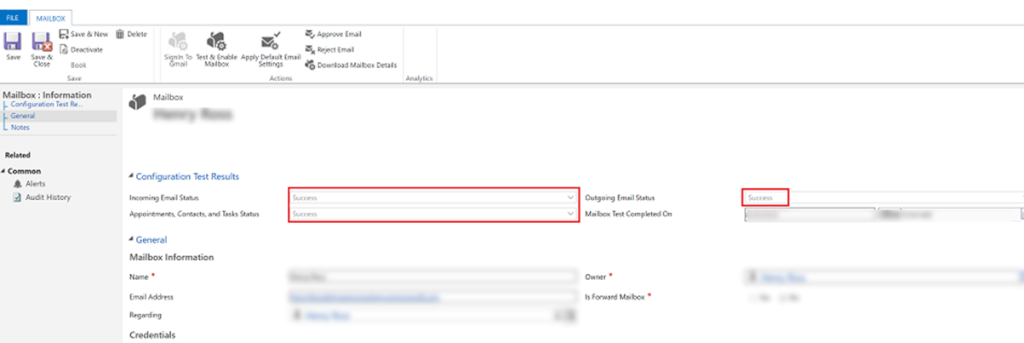
Step 2.1: Verify configuration
- Select the active mailbox and click on Edit
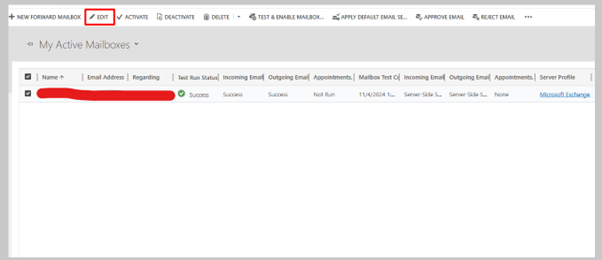
2. If the setup is successful, the configuration Test Results section will change from Not Run to Success
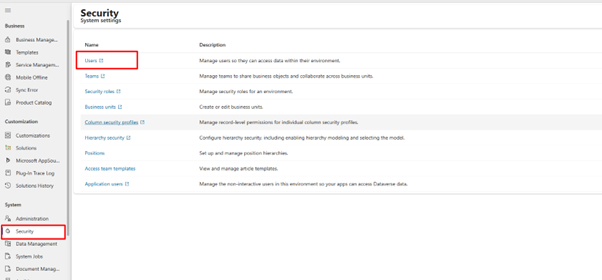
Step 3: Provide security role access
- From your app, go to Settings > Advanced Settings.

2. Go to Security and then select Users.
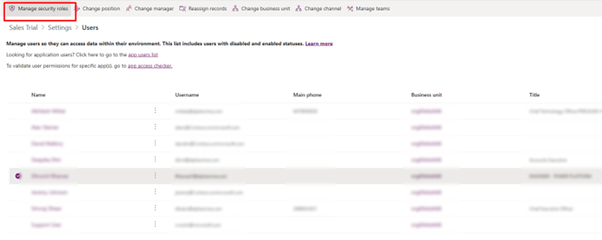
3. Select the users from the list and then select Manage Roles.
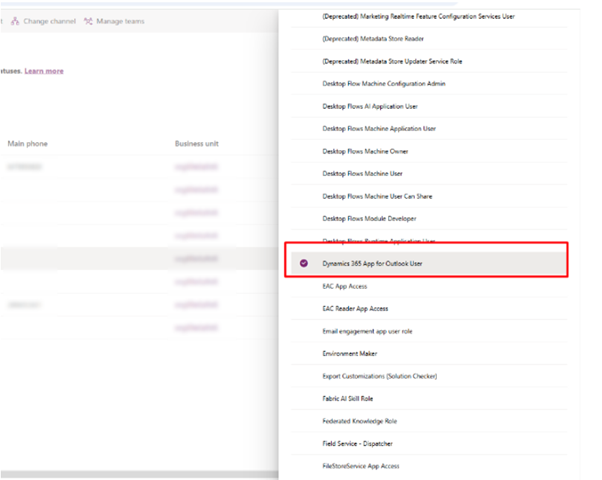
4. In the Manage User Roles dialog, select the Dynamics 365 App for Outlook User security role to the users and then select OK.
Step 4: Install App for Outlook
From your app, go to Settings > Advanced Settings.

2. Go to Dynamics 365 App for Outlook and Select the checkbox to automatically add App for Outlook to all eligible users.
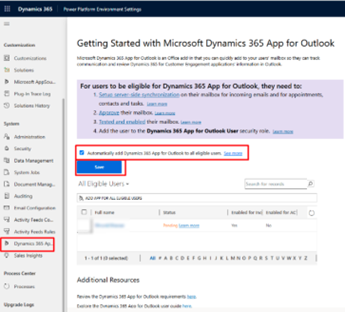
3. Select ADD APP FOR EIGIBILE USERS to deploy the app to all users that are set up correctly. The Status will change to Pending. To modernize IT systems further, check out Technology Transformation Services.
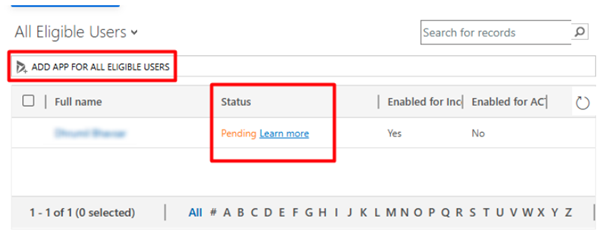
4. Push the app to certain users, select those users in the list, and then select Add App to Outlook

5. The status will change to Added to Outlook and the app will be available for your users.
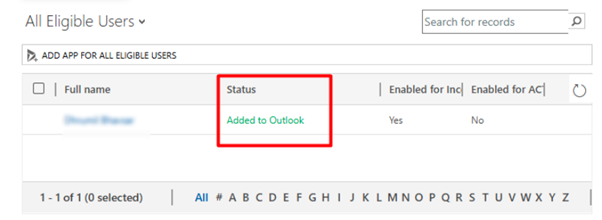
6. The app will appear in the Outlook ribbon for the added users.
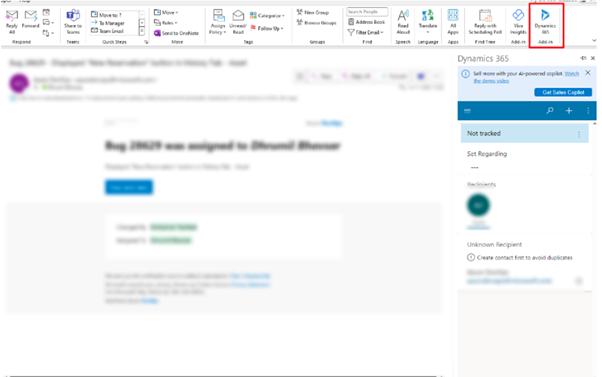
Step 5: Opening the Dynamics 365 App for Outlook
- Open the Emails You Want to Track in Microsoft Dynamics CRM and click on Dynamics 365
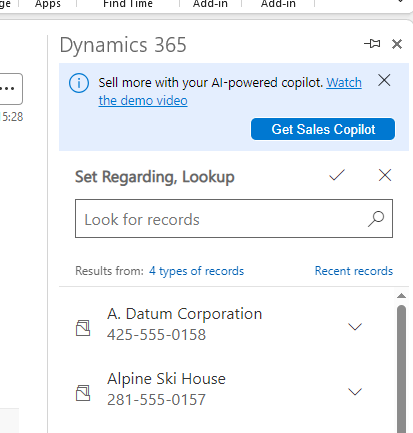
In the Set Regarding search box, type the name of the record you wish to track the email to. You can track to
> Contacts
> Leads
> Accounts
> Opportunities
> Orders
> Quotes
> and most other entities
When the email is successfully tracked you’ll see this

Adding a new record with the Dynamics 365 App for Outlook
You can create new contacts, leads or accounts from the Dynamics 365 App for Outlook.
> Open the email which contains the information you’d like to add to Dynamics
> Open the Dynamics 365 tab
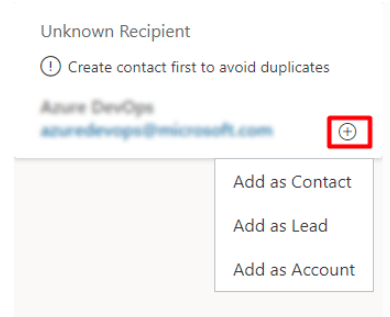
> Choose the record type to create
If you’d like the Dynamics 365 tab to remain open for all emails, you can click the pin icon
FAQs
What are the prerequisites for tracking Outlook emails in Dynamics 365 CRM?
To track emails, ensure:
> The Dynamics 365 App for Outlook is installed
> Server-side synchronization is configured
> Mailboxes are tested and enabled
> Users have the appropriate security roles
What are the benefits of tracking emails in Dynamics 365 CRM?
Tracking emails centralizes communication, improves collaboration, enhances productivity, and ensures seamless follow-ups with customers and prospects.
Do I need special permissions to track emails in Dynamics 365 CRM?
Yes, users must be assigned the "Dynamics 365 App for Outlook User" security role to access email tracking features.
How do I configure email synchronization for Dynamics 365 CRM?
Set up server-side synchronization in Dynamics 365 settings, enable mailboxes, and verify configuration to ensure seamless email tracking.
Can I track emails automatically in Dynamics 365 CRM?
Yes, you can enable automatic tracking by configuring synchronization rules and preferences in Dynamics 365 settings.
What entities can I track Outlook emails to in Dynamics 365 CRM?
Emails can be tracked to entities like Contacts, Leads, Accounts, Opportunities, Quotes, and other records within Dynamics 365 CRM.