


This blog will walk you through how to create a custom login page in Power Apps Portal using Azure AD B2C for a secure and branded sign-in experience.
Customizing the sign-in page improves user experience and allows Power Apps Portal login customization to align with corporate branding.
Step 1: Create HTML page content for a custom sign-in experience in Power Apps
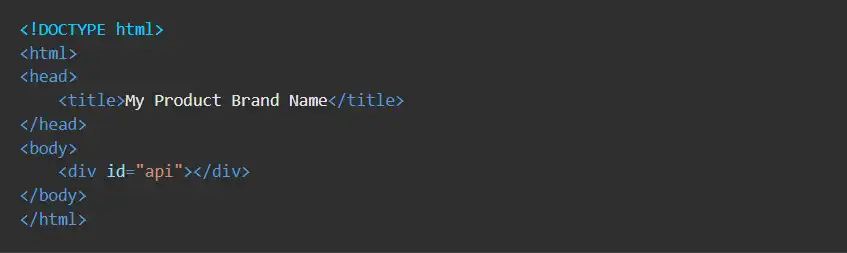
In the above code, the element indicates where Azure AD B2C content is to be inserted.
Not familiar with HTML? Refer to this HTML basics tutorial for a quick overview.
Add custom styling for the Azure AD B2C login custom page styling
Tip: You can also download the sample template code from Git.
Step 3: Create an Azure Blob storage account
To host your HTML content in Blob storage, perform the following steps:
1. Sign in to the Azure portal.
2. Make sure you’re using the directory that contains your Azure AD tenant, and which has a subscription.
3. Select the Directories + Subscriptions icon in the portal toolbar.
4. On the Portal Settings | Directories + Subscriptions page, find your Azure AD directory under the Directory name list, and then select Switch.
5. In the Azure portal, search for and select Storage Accounts
6. Select à + Create.
7. Select a Subscription for your storage account.
8. Create a new Resource Group or select an existing one.
9. Enter a unique Storage Account Name for your storage account.
10. Select the geographical Region for your storage account.
11. Performance can remain Standard.
12. Redundancy can remain Geo-Redundant Storage (GRS).
13. Select Review + Create and wait for a few seconds for Azure AD to run the validation process.
14. It will take few minutes to create the Blob Storage Account. After the deployment is complete, the storage account page opens automatically. If not, you would get a notification with a button labeled as Go to resource. Learn more about hosting static content in Azure Blob Storage documentation.
Step 4: Create a container
To create a public container in Blob storage, perform the following steps:
1. Under Data storage in the left-hand menu, select Containers.
2. Select à+ Container.
3. For Name, enter root. The name can be a name of your choosing, for example Contoso, but we use root in this example for simplicity.
4. For Public access level, select Blob.
5. Select Create to create the container.
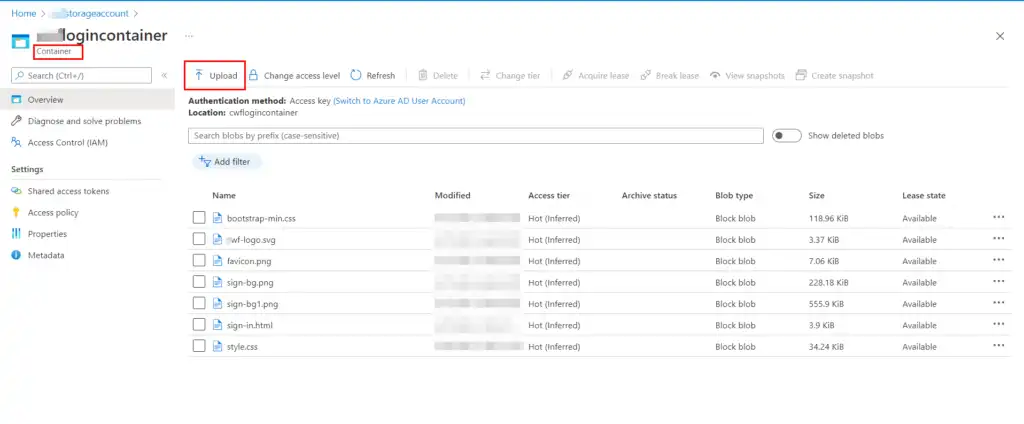
Step 5: Now you need to Upload our custom page content files into the container, which was created in step 1 and step 2.
Step 6: Configure CORS
Configure Blob storage for Cross-Origin Resource Sharing by performing the following steps:
1. Navigate to your storage account.
2. In the left-hand menu, under Settings, select Resource sharing (CORS).
3. For Allowed origins, enterhttps://your-tenant-name.b2clogin.com. Replace your-tenant-name with the name of your Azure AD B2C tenant. For example, https://fabrikam.b2clogin.com. Use all lowercase letters when entering your tenant name.
4. For Allowed Methods, select both GET and OPTIONS.
5. For Allowed Headers, enter an asterisk (*).
6. For Exposed Headers, enter an asterisk (*).
7. For Max age, enter 200.
8. At the top of the page, select Save.
Step 7: Update the user flow
1. Make sure you’re using the directory that contains your Azure AD B2C tenant.
- Select the Directories + Subscriptions icon in the portal toolbar.
- On the Portal Settings | Directories + Subscriptions page, find your Azure AD B2C directory under the directory name list, and then select Switch.
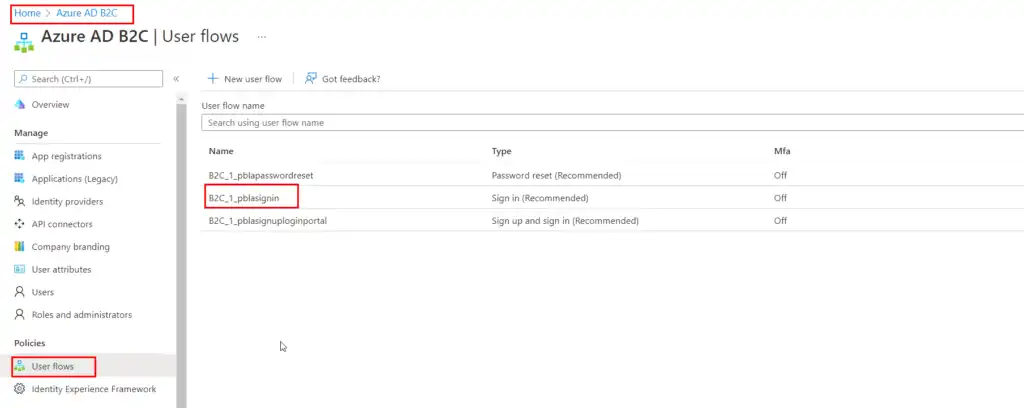
2. In the Azure portal, search for and select Azure AD B2C.
3. In the left-hand menu, select User flows, and then select the B2C_1_signinuser flow.
4. Select Page Layouts, and then under Unified select Sign-Up Or Sign-In Page; Select Yes for Use Custom Page Content.
5. In Custom Page URL, enter the URI for the custom-ui.html file that you recorded earlier.
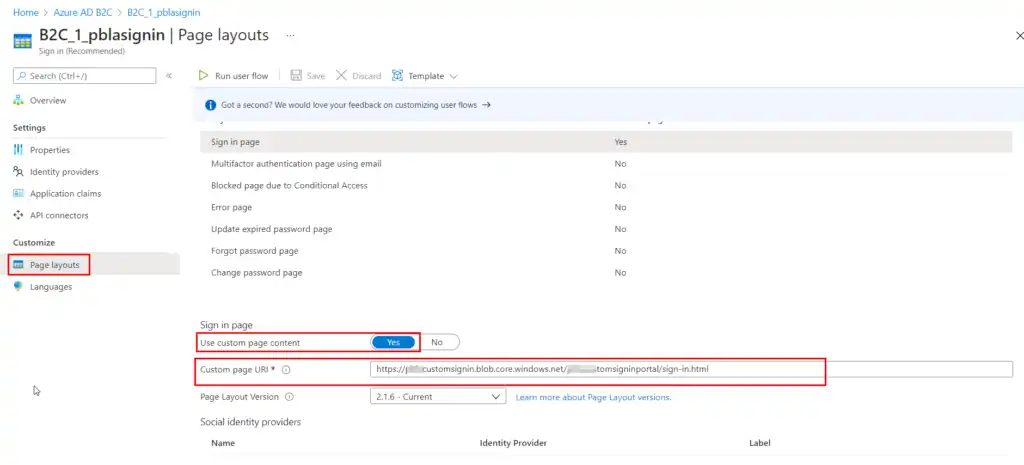
6. At the top of the page, select Save.
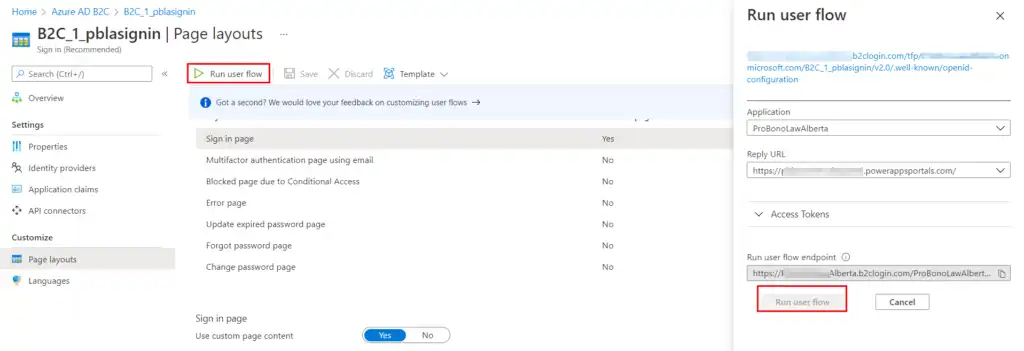
Now Test the user flow.
- In your Azure AD B2C tenant, select User Flows and select the B2C_1_signupsignin1 user flow.
- At the top of the page, select Run User Flow.
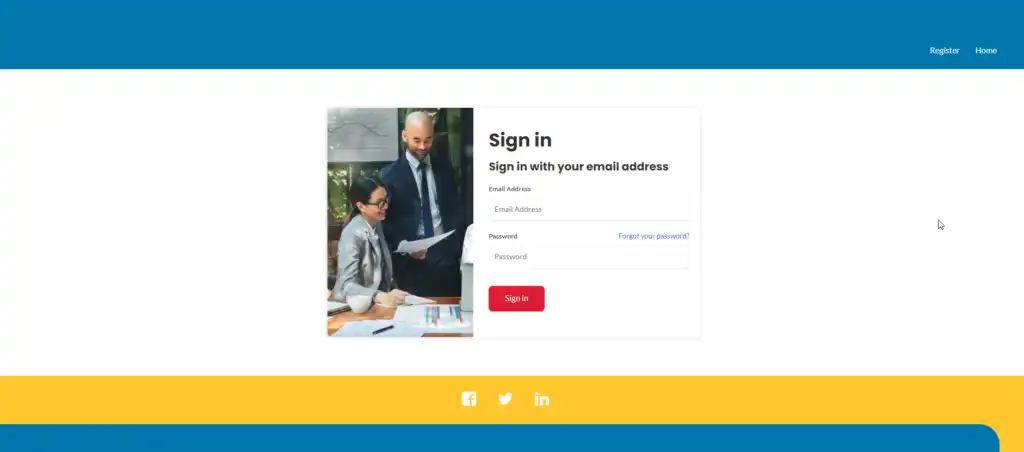
- In the pane on right side, select Run User Flow button. And voilà, you have the page ready!
A custom login page in Power Apps Portal not only improves user engagement but also enhances branding through Power Apps sign-in page customization. With Azure AD B2C, it’s easy to create a secure and seamless login experience.
Need help creating a custom login page in Power Apps Portal?
Get expert support to design secure and user-friendly login pages using Microsoft Power Apps Portal.
FAQs
How Does a Custom Login Page in Power Apps Portal Improve User Experience?
A custom login page in Power Apps Portal replaces the default Azure AD B2C branding with your organization's visual identity. First, users see a consistent look and feel when they sign in. This reduces confusion and builds trust with external users. Second, a branded login experience communicates professionalism. Customers are less likely to abandon the sign-in process when it feels familiar. Additionally, custom pages allow you to add specific instructions, language options, or accessibility features.
Moreover, you can control error messages and validation prompts to match your support processes. Furthermore, a tailored login experience improves completion rates for multi-step sign-up flows. As a result, your portal adoption improves alongside customer satisfaction. Our Power Pages development team in Toronto can design and deploy a fully branded authentication experience for your organization.
What Is Azure AD B2C and How Does It Integrate with the Portal?
Azure AD B2C is Microsoft's cloud identity service for customer-facing applications. First, it handles all authentication and authorization flows outside of your corporate directory. This makes it ideal for portals that serve external users, customers, or partners. Second, Azure AD B2C connects to Power Apps Portal through a custom identity provider configuration. Additionally, the portal delegates all login and registration flows to the B2C tenant.
Moreover, Azure AD B2C supports social logins like Google and Facebook alongside local accounts. Furthermore, the integration uses standard OpenID Connect protocols, which are widely supported. As a result, security is handled by a dedicated identity layer. This reduces your portal's attack surface and simplifies compliance with data protection regulations.
What Steps Are Required to Customize the Portal Login Experience?
Customizing the login experience requires several configuration steps. First, create an Azure AD B2C tenant and register a new application. This application represents your portal in the B2C directory. Second, configure a custom user flow in B2C to define the sign-in and sign-up experience. Additionally, create the custom HTML, CSS, and JavaScript files for your branded page.
The custom login page in Power Apps Portal must reference B2C's CDN for JavaScript validation. Moreover, host the static files on Azure Blob Storage with CORS enabled. Furthermore, update the B2C user flow to reference your custom page URL. As a result, the login page renders your branded design instead of the default Microsoft template. Our Power Apps consulting team in Toronto can guide you through every configuration step.
Is Custom Code Required to Implement a Branded Authentication Flow?
Yes, implementing a branded authentication flow requires some custom code. First, you need an HTML file that defines the page layout. The file must include a specific div element with the ID "api" where Azure AD B2C injects its form. Second, you need a CSS file to apply your brand colors, typography, and layout. Additionally, a JavaScript file can handle custom client-side validation and UI interactions.
Moreover, the HTML must reference the Azure AD B2C CDN script, which is mandatory. In contrast, you do not need a backend server or database for this setup. As a result, the implementation is lightweight and can be completed by a front-end developer. Furthermore, once the files are deployed, updates require only file changes, not a full redeployment of your portal environment.
Where Is the Best Place to Host a Custom Login Page in Power Apps Portal?
The recommended hosting location for a custom login page in Power Apps Portal is Azure Blob Storage. First, Azure Blob Storage provides high availability and low latency for static file delivery. Second, it integrates directly with the Azure AD B2C custom page configuration. Additionally, Azure CDN can be enabled in front of your Blob Storage to improve global load times. Moreover, Blob Storage supports HTTPS natively, which is required by Azure AD B2C.
In contrast, hosting on a shared web server introduces additional complexity and maintenance overhead. Furthermore, Azure Blob Storage costs are minimal for static files. As a result, this is the most cost-effective and reliable hosting option. All custom page files must be accessible via a secure HTTPS URL for the authentication flow to work correctly.
What Is CORS and Why Must It Be Configured for the Hosted Login Page?
CORS stands for Cross-Origin Resource Sharing. It is a browser security mechanism that controls which domains can load resources from a different origin. First, Azure AD B2C loads your custom page files from Blob Storage using JavaScript. Second, if CORS is not configured, the browser blocks these requests and the custom page fails to load. Additionally, you need to add the Azure AD B2C domain to your Blob Storage CORS settings.
Moreover, CORS settings must allow GET requests from the B2C endpoint. Furthermore, incorrect CORS configuration is the most common reason custom login pages fail to render. As a result, verifying CORS settings should be your first debugging step if the custom page does not appear. This is a quick fix once you understand where to apply the configuration in Azure.
Can a Custom Login Page in Power Apps Portal Handle Both Sign-In and Sign-Up?
Yes, a custom login page in Power Apps Portal can handle both sign-in and sign-up flows. First, Azure AD B2C supports combined sign-in and sign-up policies. These allow users to authenticate with an existing account or create a new one from the same page. Second, each user flow can reference a different custom page URL if needed. Additionally, you can create separate pages for sign-in, sign-up, password reset, and profile editing.
Moreover, each page can have its own branding and instructions. As a result, the entire authentication journey is fully customizable. Furthermore, multi-factor authentication pages can also be styled to match your brand. For complex portal authentication projects, explore our Power Apps developer team in Toronto for full-cycle implementation support.
How Do I Test and Validate My Custom Login Page Before Going Live?
Testing your custom login page thoroughly before going live prevents disruptions for real users. First, use a staging environment to test the full authentication flow. This includes sign-in, sign-up, password reset, and any multi-factor authentication prompts. Second, check the browser console for JavaScript errors caused by CORS or missing script references. Additionally, test across multiple browsers — Chrome, Edge, Firefox, and Safari may render your CSS differently.
Moreover, test on mobile devices to ensure the responsive design works correctly. Furthermore, use Azure AD B2C's built-in test run feature to simulate user flows without a real portal. As a result, most issues are identified before production deployment. Review the Microsoft Azure AD B2C UI customization guide for detailed validation and testing steps.