


Connecting DocuSign with Microsoft Dynamics 365 CRM is a powerful way to simplify eSignature workflows without writing code or relying on Power Automate. This guide walks you through the process of configuring DocuSign directly in Dynamics 365 CRM for a seamless signing experience.
The DocuSign Dynamics 365 CRM integration enables businesses to automate their document signing workflows directly within the CRM system. By connecting DocuSign to Dynamics 365 CRM, users can send, sign, and monitor documents without ever leaving the CRM interface, improving efficiency and reducing delays.
The DocuSign Dynamics 365 CRM integration empowers teams to streamline signature approvals and maintain complete visibility into document progress—all within the Dynamics 365 environment. This integration reduces manual tasks, enhances compliance, and supports real-time customer engagement.
Prerequisites
> DocuSign Account: Make sure you have an active DocuSign account.
> Dynamics 365 CRM Access: Administrator-level access to your CRM instance is required.
> DocuSign for Dynamics 365 CRM App: Available on Microsoft AppSource.
Step 1: Install the DocuSign for Dynamics 365 CRM App
The first step is to install the DocuSign integration app directly from Microsoft AppSource.
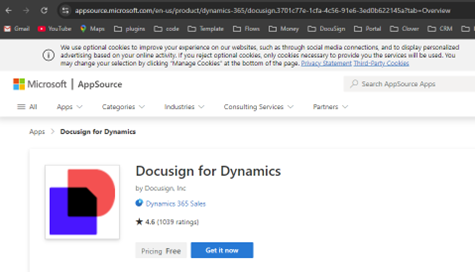
- Go to Microsoft AppSource and search for “DocuSign for Dynamics 365 CRM”.
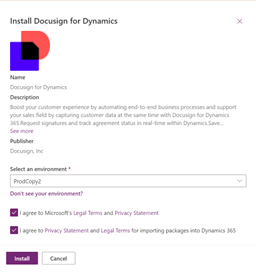
- Click Get It Now and sign in to your Dynamics 365 CRM environment.
- Follow the prompts to install the DocuSign app.

Tip: Install DocuSign app using Global Admin.
Step 2: Configure the DocuSign Connection
Once the app is installed, you need to configure the DocuSign settings to link it with Dynamics 365 CRM.
After setting up the DocuSign Dynamics 365 CRM integration, administrators can manage user access and permissions directly from the CRM. This configuration ensures a secure and compliant environment for document transactions initiated through DocuSign within Dynamics 365 CRM.
- Go to Settings > DocuSign Settings in Dynamics 365 CRM.
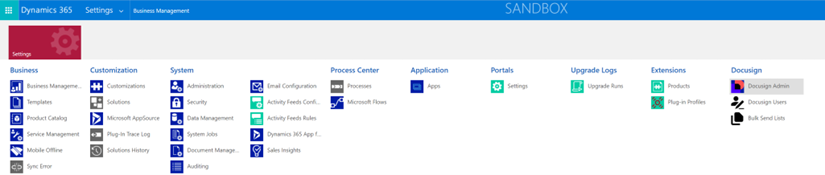
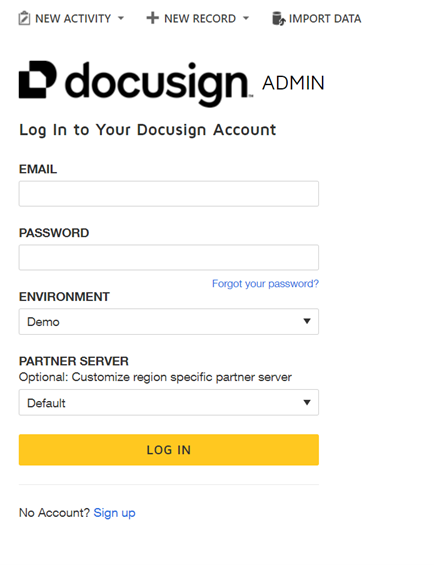
2. Click on DocuSign Admin and DocuSign login window will open.
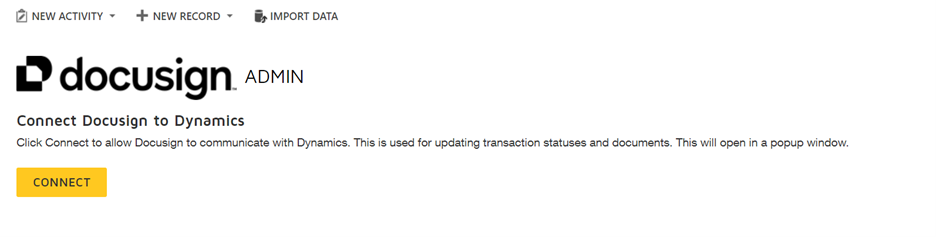
3. Enter your DocuSign credentials and connect. The DocuSign Admin Home page opens.
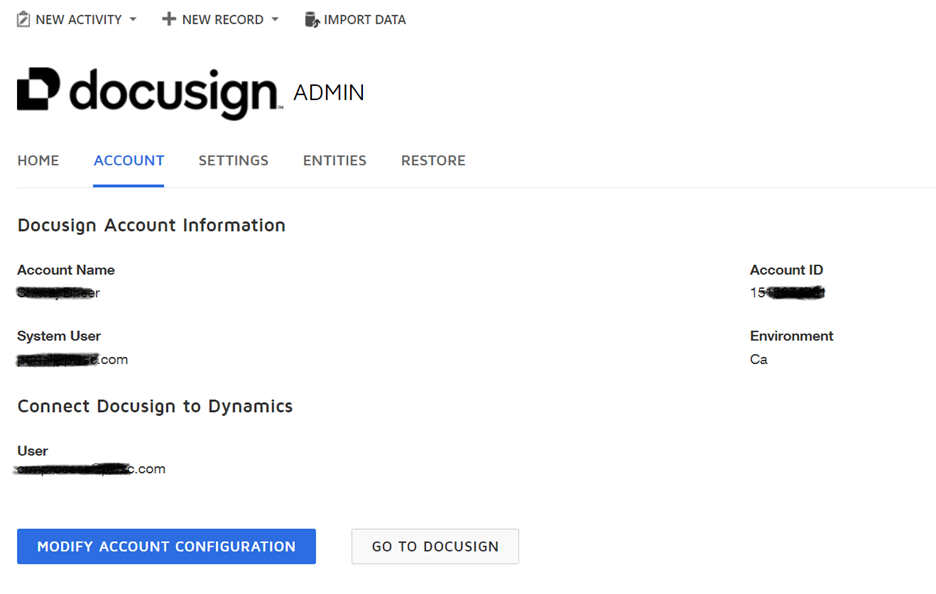
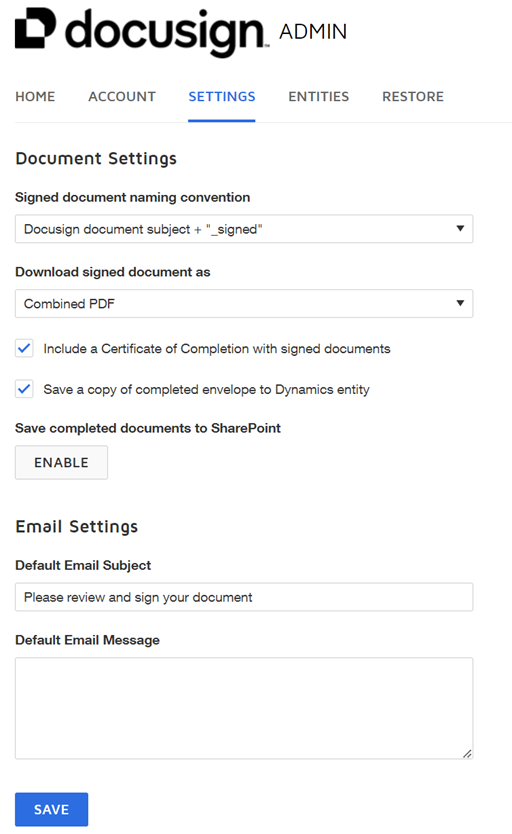
4. Now, you will be able to see your account, settings and entities tabs where you can make the changes as per your requirement.
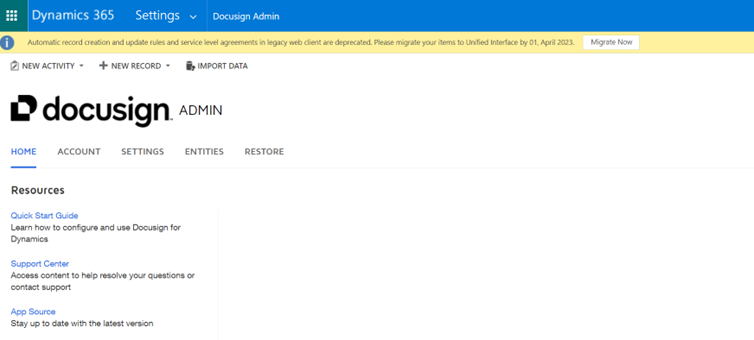
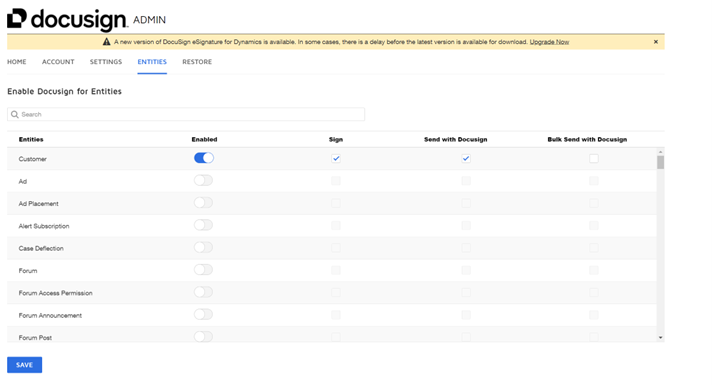
Under Account, you can check your account details. In setting tab, you can do document, email and default message setting and under entities tab you can enable DocuSign for required entities.
Tip: Sign in as an integration admin user with DocuSign admin permissions. Use a service account dedicated to the integration to ensure it remains consistent over time.
Tip: Do configuration using Global Admin.
Step 3: Manage User Access to DocuSign
To enable users to access DocuSign in Dynamics 365, ensure they meet the following requirements:
> They must be members of the DocuSign eSignature account associated with the Dynamics instance. This account is specified in the DocuSign Admin configuration settings.
> They must be assigned the DocuSignUser role in Dynamics.
Basic Requirements for User Access
For Dynamics users to sign documents or request signatures through DocuSign, they need to be members of the DocuSign account specified in DocuSign Admin. As long as they are part of this DocuSign account and use the same email address registered in the Dynamics organization, they will have seamless access to DocuSign features. If their email address differs or they are not members of the DocuSign account, the DocuSign administrator will need to assist.
When a Dynamics 365 CRM user initiates any DocuSign action, the system verifies the user’s presence in DocuSign using their Dynamics email address:
> If the user is a member of the specified DocuSign account, they are added to the DocuSign Users table and can proceed with using the application.
> If the user is not a member of the specified DocuSign account, a message will prompt them to contact the solution administrator for assistance.
Assigning the DocuSignUser Role
> To enable a non-administrative user in Dynamics 365 CRM to access the DocuSign solution, you, as the Dynamics 365 CRM administrator, need to assign the DocuSignUser role to their profile.
> Sign in as a Dynamics 365 CRM administrator.
> Go to Settings > Security.
> Select Users.
> Find and select the user(s) to whom you want to grant access.
> Click Manage Roles, then assign the DocuSignUser role.
To add a new record:
> Click NEW.
>In the System User field, search for and select the user.
> Enter the user’s DocuSign email address in the DocuSign Email field.
> Click SAVE.
Note: There is also a DocuSign Trace role, which is meant for system debugging only; do not assign it to users.
Click OK.

Editing the DocuSign Users Table
> As an administrpdate the DocuSign Users table to add or modify user records, especially if a user has a different email address for their DocuSign account.
> Log in as a Dynamics 365 CRM administrator.
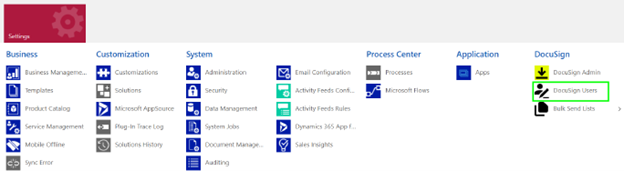
> Navigate to Settings > DocuSign Users.
To edit an existing record:
> Find and select the user record, then click Edit.
> Update the DocuSign Email field to match the email address used in their DocuSign account.
> Click SAVE.
To add a new record:
>Click NEW.
> In the System User field, search for and select the user.
> Enter the user’s DocuSign email address in the DocuSign Email field.
> Click SAVE.
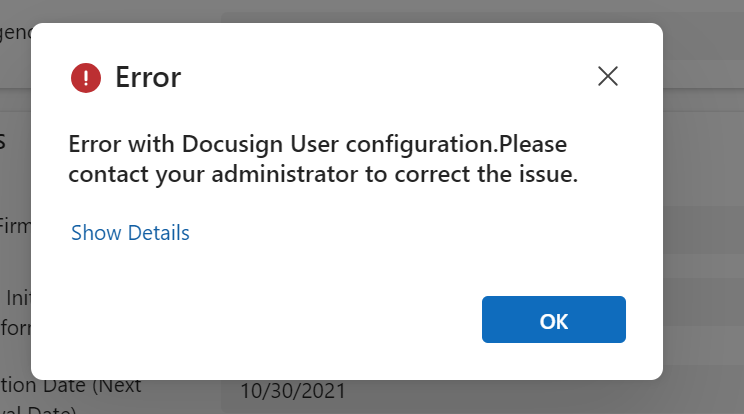
The next time the user uses the DocuSign solution, the system will verify if the email in the DocuSign Users record matches a member in the DocuSign account. If the information is correct, the user will be able to use the solution, and the table record will automatically update with additional DocuSign details. Otherwise, user will get below error.
Step 4: Send an Envelope
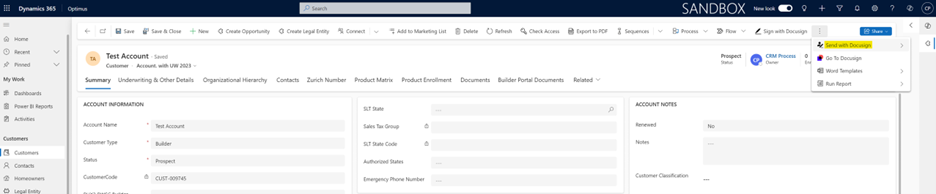
- Open the entity record for which you want to send the envelope. Make sure this entity is enabled to send envelopes if not then check step2.
- In the command bar, select Send with DocuSign and then Get Signatures.

3. Files attached e automatically included in the envelope. If SharePoint integration is enabled, all related SharePoint documents are also added. You can select which files to send by using the checkboxes in the SELECT DOCUMENT(S) TO SEND window.
4. Contacts linkedatically included in the envelope. You can choose recipients from the record’s contacts or from other contacts available in Dynamics. To add additional contacts, click Add Recipients and use the checkboxes to select them.
5. When you are doiles, select OPEN DOCUSIGN to open your DocuSign account and continue the sending process.
6. From here you can add or edit your message to all recipients and do the adjustments with subject as per the requirement.
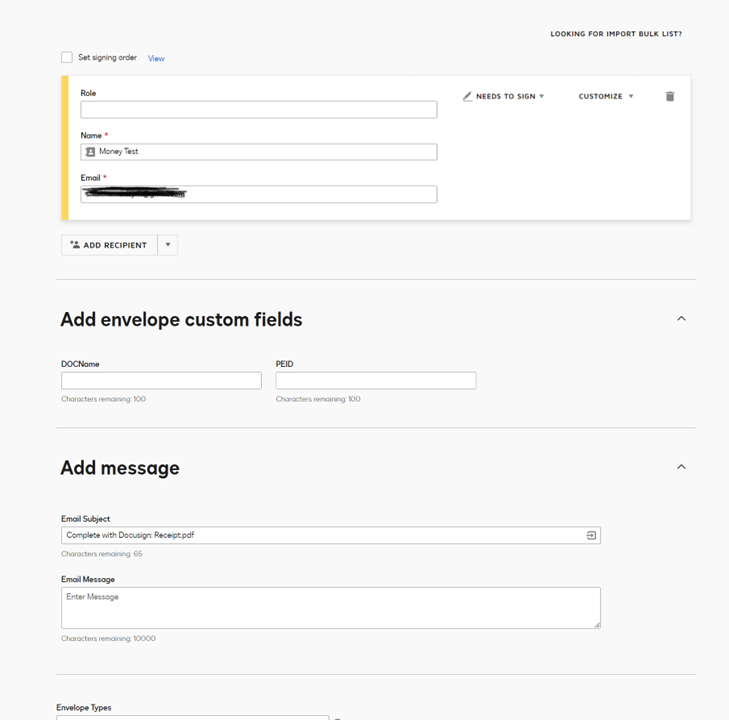
7. Moreover, you can add DocuSign fields from fields view.
8. After all these changes you can hit send button to send document for signing.
Step 5: Sign Documents
- Open entity records in CRM for which you want to sign the documents.
- In the command bar, click Sign with DocuSign

3. A new tab opens in DocuSign, allowing you to add fields to the document and sign.By default, all files attached in the Notes of the Dynamics record are included in the DocuSign envelope.
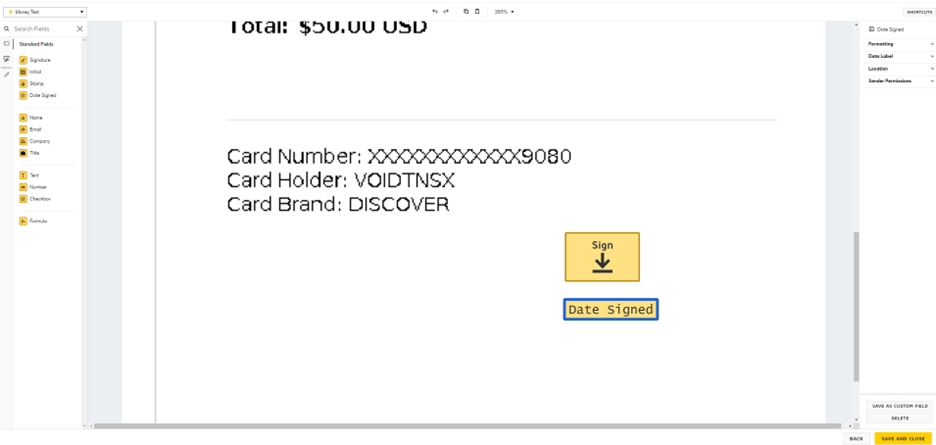
4. Click Continue to add your fields, such as signature, date signed, or custom text fields.
5. In the Fields palette on the left side of the window, select the field you wish to add, then drag and drop it to the desired position within the document.
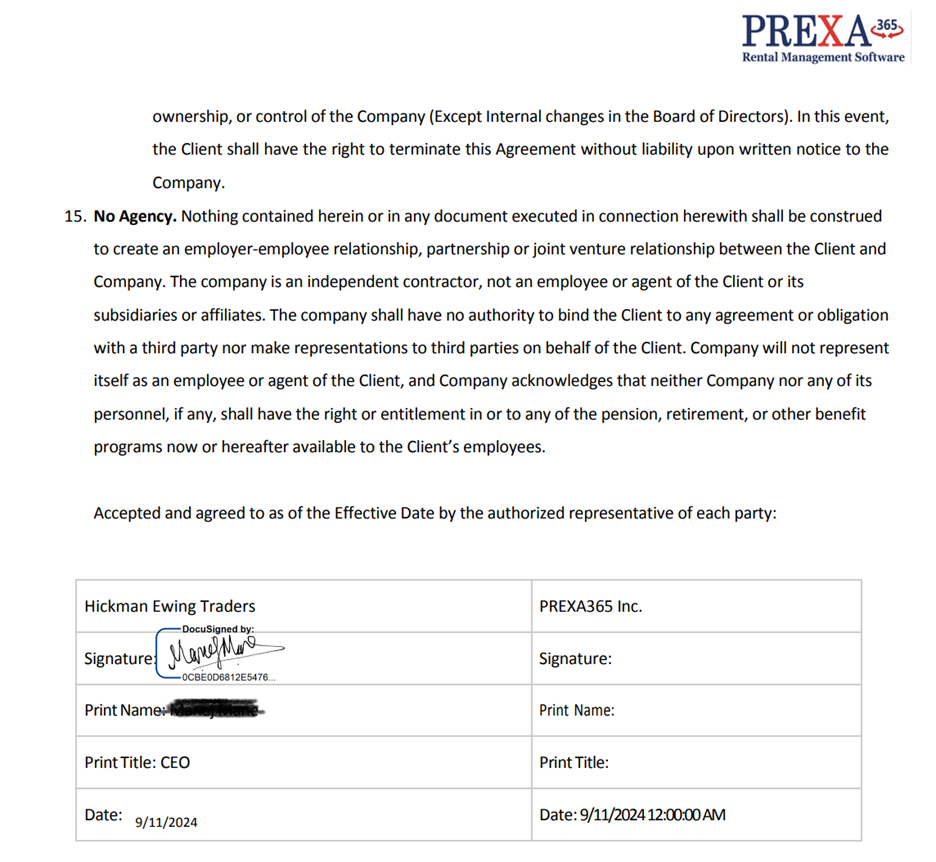
6. Click Finish to process with DocuSign. The signed document is then saved as a PDF file in the Notes section of the entity where you initiated the signing.
Ready to simplify document signing in Dynamics 365?
Connect DocuSign with Microsoft Dynamics 365 to handle agreements, approvals, and signatures without leaving your CRM.
FAQs
What Is DocuSign Integration with Dynamics 365?
DocuSign Integration with Dynamics 365 connects your digital signature platform directly with your CRM, enabling sales and operations teams to send, track, and receive signed documents without leaving the Dynamics 365 interface. Instead of downloading documents, emailing them, and manually uploading signed copies, the integration automates the entire document lifecycle. When an opportunity reaches a certain stage, a DocuSign envelope can be triggered automatically, prefilled with CRM data such as the customer's name, address, and agreed terms. Once signed, the completed document is stored back against the CRM record automatically. This removes bottlenecks from the contract process, reduces turnaround time from days to hours, and provides a fully auditable signature trail that satisfies legal and compliance requirements. Learn more about Microsoft Dynamics 365 Sales.
Do I Need Developer Skills to Connect These Two Platforms?
Most implementations do not require custom development. DocuSign provides a dedicated application for Dynamics 365 that can be installed through Microsoft AppSource with no coding required. The app adds a DocuSign section directly to Dynamics 365 entity forms such as Opportunities, Quotes, and Contracts, and administrators configure document templates, field mappings, and recipient rules through a graphical interface. For more advanced scenarios — such as triggering document sends based on workflow conditions, pre-populating form fields from CRM data, or building multi-step approval sequences — some Power Automate flow configuration or template editing may be needed. However, most organisations get started with the no-code setup and then add automation incrementally as they become more familiar with the platform's capabilities and their internal process requirements over time.
What Are the Prerequisites for Setting Up This Connection?
Before setting up this integration, you need an active Dynamics 365 subscription — most commonly Sales, Customer Service, or Business Central — and a DocuSign account with API access enabled. A Microsoft 365 administrator account is required to install the DocuSign app from AppSource and configure permissions within your tenant. If you plan to use Power Automate to trigger document sends automatically, a licence supporting premium connectors is also needed. On the DocuSign side, your account must have the Dynamics 365 connector enabled, which is typically available on Business or Enterprise plans. Before going live, it is good practice to configure at least one document template with merge fields mapped to your Dynamics 365 entity fields, and to test the full end-to-end flow in a non-production environment to avoid unexpected behaviour with live customer records.
Which Document Types Can Be Sent and Signed Through This Workflow?
A wide range of business documents can be processed through this integration. Sales contracts, service agreements, non-disclosure agreements, and statements of work are the most common use cases. Proposals and quotes generated from Dynamics 365 can be merged with CRM data and sent directly to customers for signature without any manual data entry. Purchase orders, vendor agreements, and supplier onboarding forms can also be routed through DocuSign from within the CRM. Any document requiring a legally binding signature or formal acknowledgement is a candidate for automation. DocuSign supports PDF, Word, and various other document formats. Templates can be pre-designed with tabs marking where signatures, initials, dates, or text inputs are required, and these templates are linked to specific Dynamics 365 entity types for streamlined selection during the sending process.
Can Customers Complete the Signing Process Without Leaving the CRM?
Yes. One of the most significant productivity benefits is that signers — including internal approvers and external customers — can complete the signing process without switching to a separate application. When a document is sent, recipients receive an email with a DocuSign signing link, but internal users can also access and sign pending envelopes directly from the DocuSign section embedded in the Dynamics 365 entity form. Sales reps, managers, and approvers can review and execute agreements from their familiar CRM workspace. Real-time status updates appear in the CRM record as the envelope progresses through each signer, so teams always know exactly where in the signing process a document sits without needing to log into DocuSign separately. This eliminates context switching and speeds up the overall contract execution cycle considerably for busy sales teams.
Is DocuSign Integration with Dynamics 365 Secure and Compliant?
DocuSign Integration with Dynamics 365 is designed to meet enterprise security and compliance standards. DocuSign holds certifications including ISO 27001, SOC 2 Type II, and GDPR compliance. All data transmitted between Dynamics 365 and DocuSign is encrypted in transit using TLS, and documents stored within the platform are encrypted at rest. The integration uses OAuth 2.0 for authentication, ensuring that Dynamics 365 credentials are never exposed to third-party systems. Audit trails are automatically maintained for every envelope — recording who accessed the document, when it was viewed, and when each signature was applied. These audit records can be stored back in Dynamics 365 alongside the completed document, giving compliance and legal teams a complete, tamper-evident record of every agreement that satisfies regulatory requirements.
Where Are Completed and Signed Documents Stored After Execution?
Once all required signatures have been collected, DocuSign automatically generates a completed PDF and delivers it to all parties via email. Within the Dynamics 365 integration, the completed document can be configured to automatically attach to the relevant CRM record — for example, attaching a signed contract to the parent Opportunity or Account. This eliminates manual uploading and ensures all team members with access to that CRM record can view the finalised agreement immediately. If your organisation uses SharePoint for document management, Power Automate can be configured to move completed documents to a designated SharePoint library linked to the CRM record for easy retrieval. This gives both sales and legal teams a centralised, organised repository of all executed agreements without additional administrative effort or manual file management steps.
Can DocuSign Integration with Dynamics 365 Handle Multiple Signers?
Yes. DocuSign Integration with Dynamics 365 fully supports multi-signer workflows where documents need to be reviewed and executed by more than one person in a defined or parallel sequence. You can configure signing orders so that an internal approver must countersign before the document reaches the customer, or so that all parties receive it simultaneously and can sign in any order. Conditional routing rules allow the signer sequence to adapt based on the document's value, type, or associated CRM fields. Reminders and expiry settings can be configured so that overdue signers receive automatic follow-up emails without manual intervention. If you need help designing multi-signer workflows tailored to your sales and contracting process, our Dynamics 365 integration consultants can configure and test the full sequence for you.
How Do I Get Started with the DocuSign App Installation?
The easiest way to begin is by visiting Microsoft AppSource and searching for the official DocuSign for Dynamics 365 application. Click Get It Now and follow the guided installation process, which links the app to your Microsoft 365 tenant and your chosen Dynamics 365 environment. Once installed, a DocuSign administrator will need to configure the connection by entering DocuSign account credentials and authorising the integration via OAuth. After authentication, you can configure entity-level settings — deciding which Dynamics 365 forms should display the DocuSign panel, which templates should be available for each form, and what fields should be auto-populated from CRM data. A test envelope should be sent and reviewed carefully before rolling the integration out to your full team to ensure everything behaves as expected in your specific environment.